Observer Pattern Tutorial
In this tutorial, we will explore the powerful Gang of Four (GoF) observer design pattern. By the end of this guide, you will have a solid understanding of how to define and apply the observer pattern in your software projects. We will walk you through creating a UML class diagram for the observer pattern and show you how to save it as a design pattern file that can be easily reused in the future. Whether you are new to design patterns or an experienced software developer, this tutorial will provide you with the tools you need to implement the observer pattern in your projects.
What is Observer Design Pattern?
The Observer Design Pattern is a software design pattern that defines a one-to-many dependency relationship between objects. In this pattern, one object (called the “subject”) maintains a list of its dependents (called “observers”) and notifies them automatically of any state changes, usually by calling one of their methods.
The purpose of the Observer pattern is to decouple the subject from its observers, allowing them to vary independently of each other. This means that changes to the subject will not affect the observers directly, and new observers can be added or removed from the list without modifying the subject.
The Observer pattern is commonly used in event-driven systems, where the subject is an event source and the observers are event listeners. It is also used in user interface frameworks, where changes to the user interface are reflected in real-time across all observers. The Observer pattern is one of the most widely used design patterns in software development and is an important concept for any programmer to understand.
Modeling Design Pattern with Class Diagram
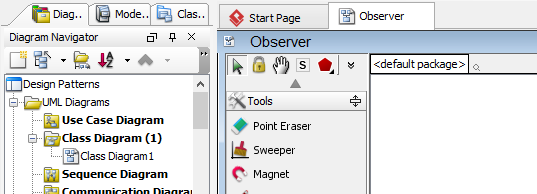
- Create a new project Design Patterns.
- Create a class diagram Observer.
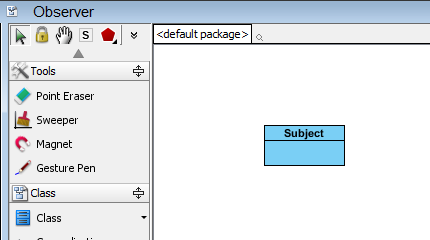
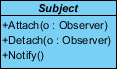
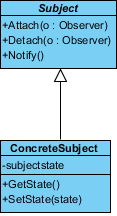
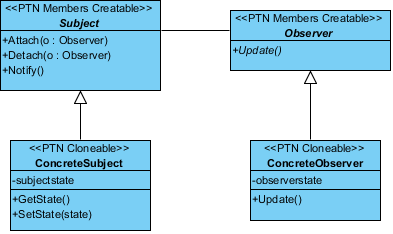
- Select Class from diagram toolbar. Click on the diagram to create a class. Name it as Subject.
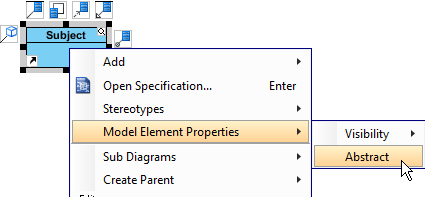
- Right-click on Subject, and select Model Element Properties > Abstract to set it as abstract.
- Right-click on Subject class, and select Add > Operation from the popup menu.
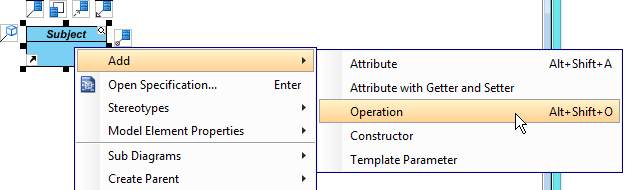
- Name the operation Attach(o : Observer).
- Repeat step 5 and 6 to create the remaining two operations : Detach (o : Observer), Notify().
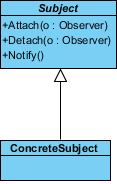
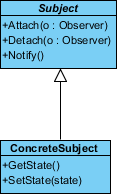
- Move the mouse cursor over the Subject class, and drag out Generalization > Class to create a subclass ConcreteSubject.
- Repeat steps 5 and 6 to create the following operations in ConcreteSubject: GetState(), SetState(state).
- Right-click on the ConcreteSubject class, and select Add > Attribute from the popup menu. Name the attribute subjectstate.
- Move the mouse cursor over the Subject class, and drag out Association > Class to create an associated class Observer.
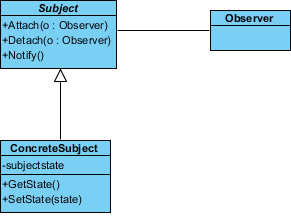
- Right-click an Observer, and select Model Element Properties > Abstract to set it as abstract.
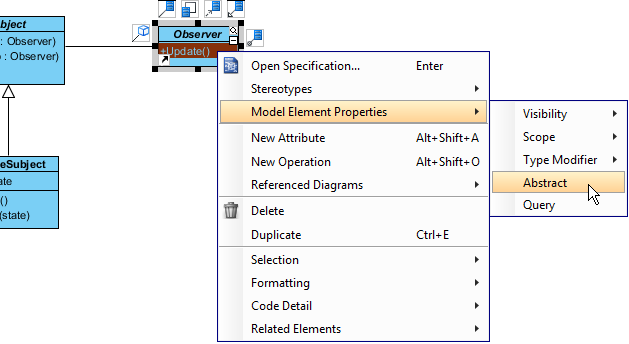
- Repeat steps 5 and 6 to create the following operation in Observer: Update().

- Right-click on Update(), and select Model Element Properties > Abstract to set it as abstract.
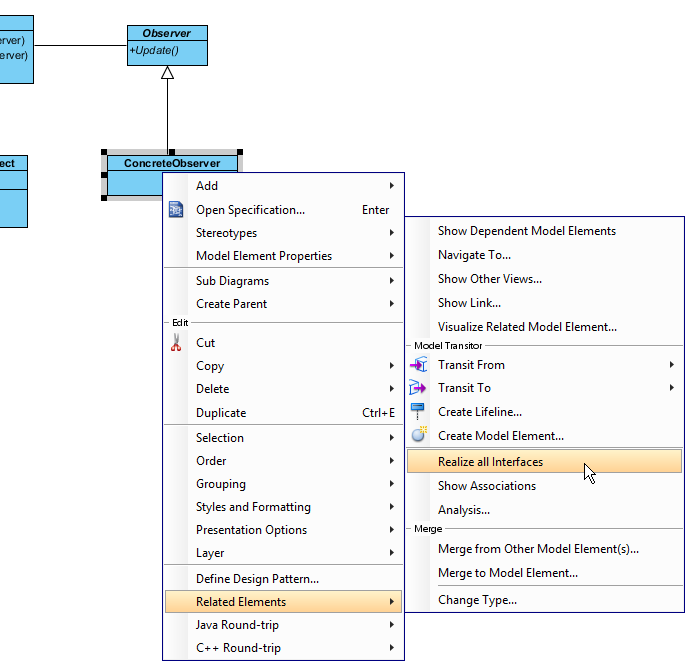
- Move the mouse cursor over the Observer class, and drag out Generalization > Class to create a subclass ConcreteObserver.
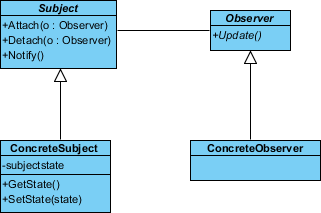
- ConcreteObserver will inherits the operations from Observer. Right-click on ConcreteObserver and select Related Elements > Realize all Interfaces from the popup menu.
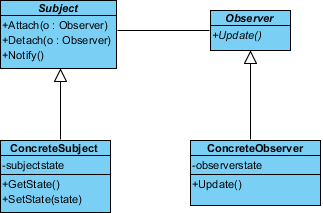
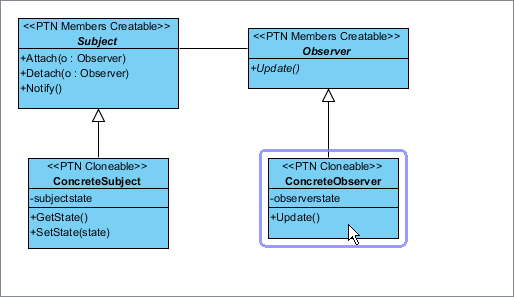
- Right-click on the ConcreteObserver class, and select Add > Attribute from the popup menu. Name the attribute observerstate. Up to now, the diagram should look like:
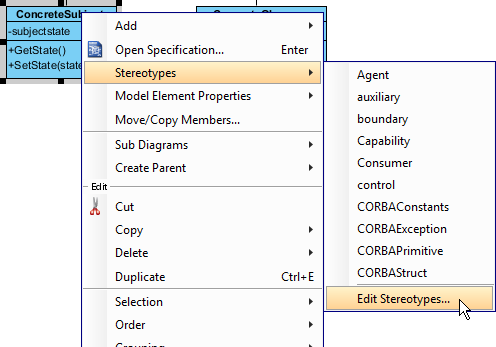
- In practice, there may be multiple concrete subjects and observers. To represent this, stereotype the class ConcreteSubject and ConcreteObserver as PTN Cloneable. Right-click on ConcreteSubject and select Stereotypes > Stereotypes… from the popup menu.
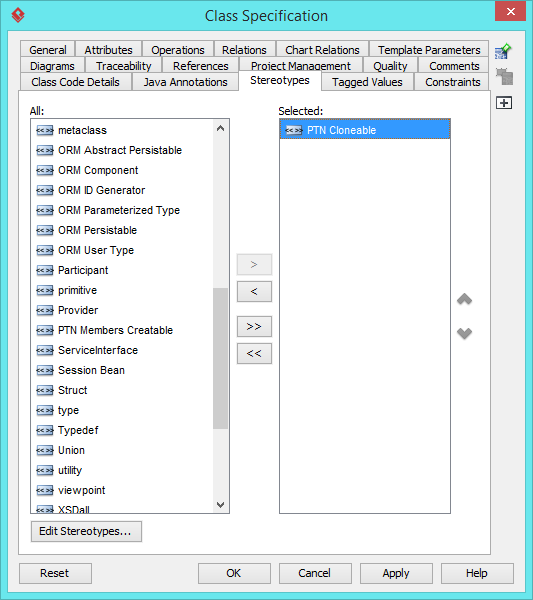
- In the Stereotypes tab of the Class Specification dialog box, select PTN Cloneable and click > to assign it to ConcreteSubject class. Click OK to confirm.
- Repeat steps 18 and 19 on ConcreteObserver.

- In practice, there are domain specific operations in subject and observer. To represent this, stereotype the class Subject and Observer as PTN Members Creatable. Repeat steps 18 and 19 to stereotype Subject and Observer as PTN Members Creatable.
Saving the Defining Pattern
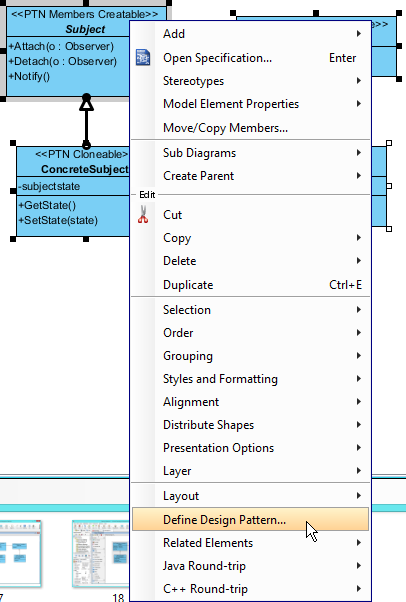
- Select all classes on the class diagram.
- Right-click on the selection and select Define Design Pattern… from the popup menu.
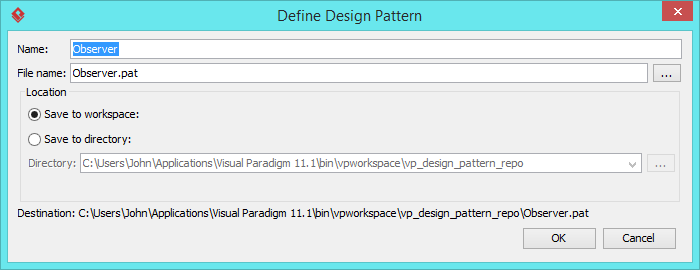
- In the Define Design Pattern dialog box, specify the pattern name Observer. Keep the file name as is. Click OK to proceed.
Applying Design Pattern on Class Diagram
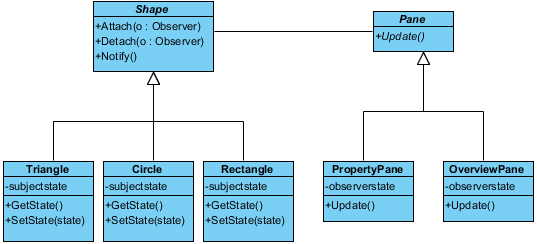
In this section, we are going to apply the observer pattern to model a diagram editor for observing changes of model, and calling various panes like the property and overview panes to update their content.
- Create a new project Diagram Editor.
- Create a class diagram Domain Model.
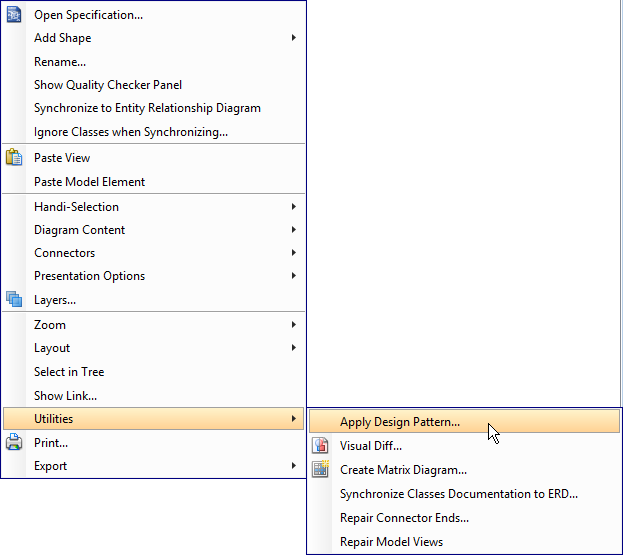
- Right-click on the class diagram and select Utilities > Apply Design Pattern… from the popup menu.
- In the Design Pattern dialog box, select Observer from the list of patterns.
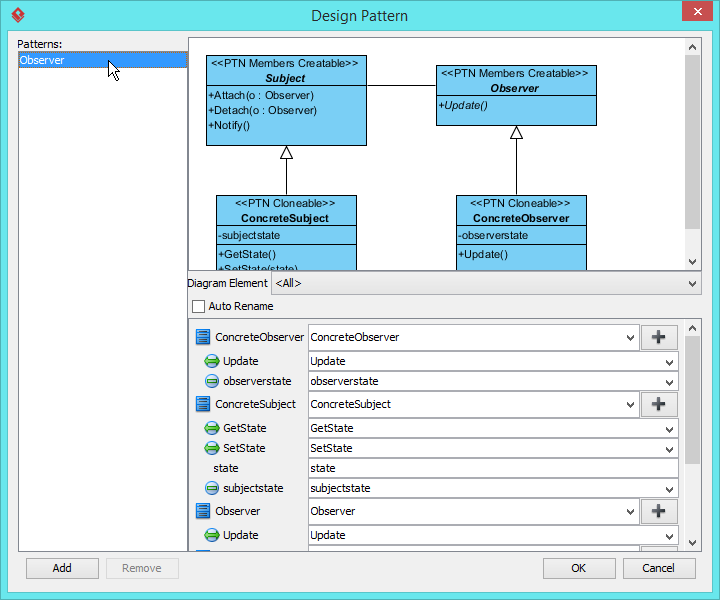
- At the bottom pane, rename classes Subject, Observer, ConcreteSubject and ConcreteObserver to Shape, Pane, Rectangle and PropertyPane respectively.
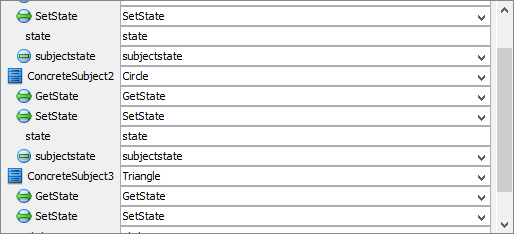
- Besides rectangle, there are more types of shape like circle and triangle. Select ConcreteSubject from the overview pane.

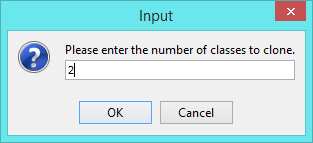
- Click on the + button next to the class name and select Clone… from the popup menu.

- Enter 2, which is the number of classes to clone, and click OK to confirm.
- At the bottom pane, rename ConcreteSubject2 and ConcreteSubject3 to Circle and Triangle.
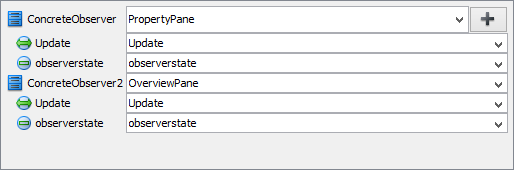
- For observers, there are also panes like overview pane. Select ConcreteObserver from the overview pane.
- Click on the + button next to the class name and select Clone… from the popup menu.
- Enter 1, which is the number of classes to clone, and click OK to confirm.
- At the bottom pane, rename ConcreteObserver2 to OverviewPane.
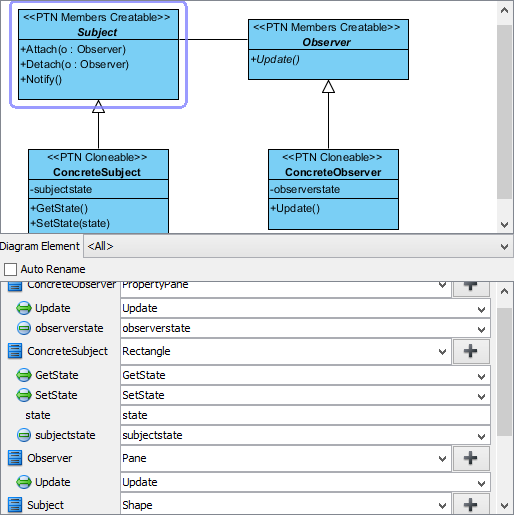
- Click OK to confirm. Here is the diagram formed: