How to Draw BPMN Conversation Diagram?
In this tutorial, we will guide you through the process of creating a simple conversation diagram for a logistics system. The conversation diagram visually represents the messages exchanged between different participants, also known as pools. By following this tutorial, you will learn how to create a clear and concise conversation diagram to represent the communication flow in your logistics system.
What is a BPMN Conversation Diagram?
Are you familiar with conversation diagrams and how they can help model business processes? A BPMN (Business Process Model and Notation) Conversation Diagram is a flowchart-like diagram that illustrates the interactions and messages exchanged between two or more participants in a business process.
In a BPMN Conversation diagram, each participant is represented by a swimlane or a column, and the activities or messages exchanged between the participants are represented by conversation nodes. There are two types of conversation nodes: sending and receiving. Sending conversation nodes are represented by an open circle, while receiving conversation nodes are represented by a closed circle.
To represent the order of activities and the flow of information or data between participants, conversation nodes are connected by sequence flows or message flows. Solid lines with arrows represent sequence flows, while dotted lines with arrows represent message flows.
BPMN Conversation diagrams are particularly useful when modeling complex business processes that involve multiple participants, processes, and external entities. They offer a clear and concise overview of interactions and messages exchanged between the participants, helping identify potential bottlenecks, inefficiencies, and errors in the process. With the insights gained, organizations can optimize and streamline their processes for better performance and outcomes.
Drawing BPMN conversation diagram
- Create a new project by selecting Project > New from the application toolbar. In the New Project window, enter Logistic System as project name and click Create Blank Project.
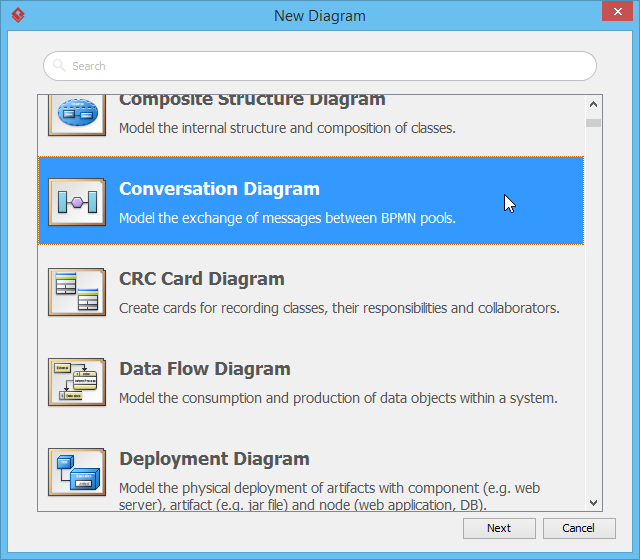
- Create a conversation diagram by selecting Diagram > New from the application toolbar. In the New Diagram window, select Conversation Diagram and click Next.
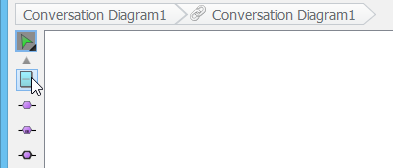
- Leave the diagram name unchanged and then click OK to create the diagram.
- Let’s start by creating a participant. Select Participant from the diagram toolbar.
- Click on the diagram to create a participant. Enter Retailer as name and press Enter to confirm.

- Move the mouse pointer over the participant Retailer

- Press on the Resource Catalog resource at the top right of shape and drag it out.
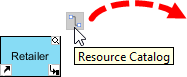
- Release the mouse button on the empty space. Select Sub-Conversation Link -> Participant from Resource Catalog to create a new participant.

- Enter Supplier as the name of the participant and press Enter to confirm. Then, enter Delivery Negotiations as the name of the sub-conversation (i.e. the purple shape in the middle). Again, press Enter to confirm.

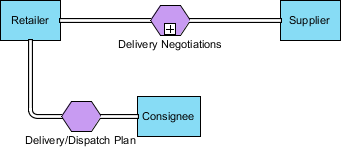
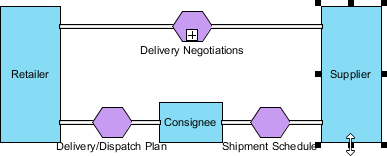
- Select Participant in diagram toolbar. Click below sub-conversation link Delivery Negotiations to create a participant. Name it as Consignee.

- Move the mouse pointer over Consignee. Press on the Resource Catalog resource and drag to the participant Retailer to create a link.
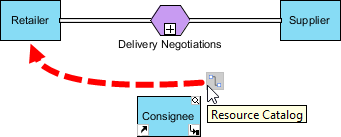
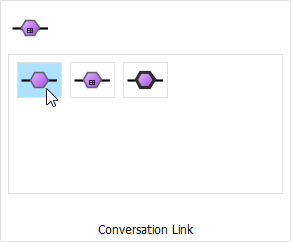
- Select Conversation Link in Resource Catalog.
- Enter Delivery/Dispatch Plan as the name of the conversation link and then press Enter to confirm. If the created shape is overlapped with others, tidy up by dragging the conversation link.
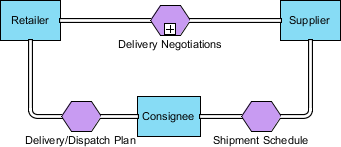
- Repeat the previous steps to make Consignee converse with Supplier. Name the communication Shipment Schedule.
- Resize the participants Retailer and Supplier to make them taller.
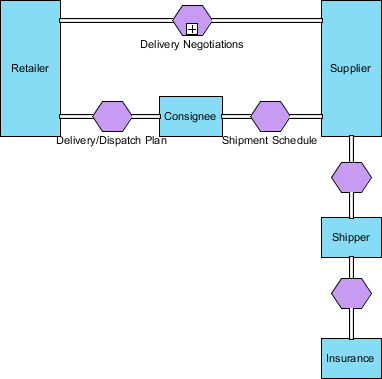
- Make use of the Resource Catalog to create participant Shipper from Supplier, which conversation link in between. Then, create another participant Insurance from Shipper.
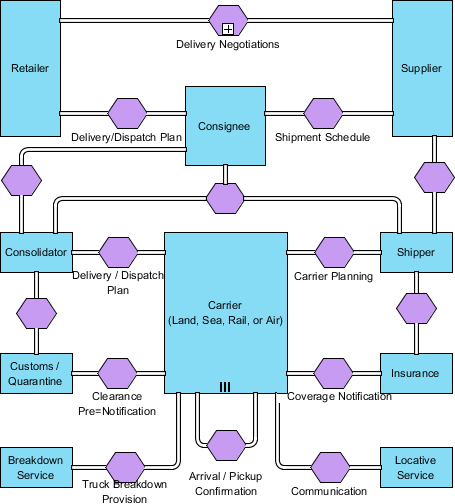
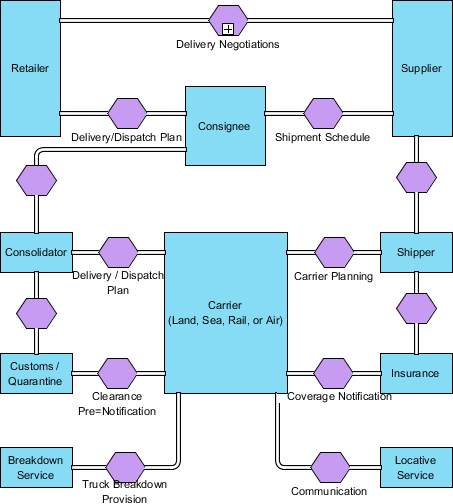
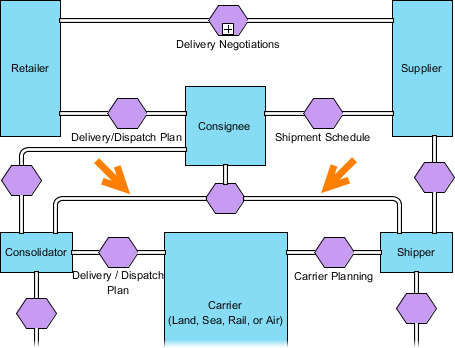
- Keep on drawing the conversation diagram to make it look like the one below. You should be able to finish this step with the techniques described. Note that you can add a line break when naming a shape by pressing Alt + Enter.
- Move the mouse pointer over the participant Consignee. Press on the Resource Catalog button and drag it to the empty space below the participant.
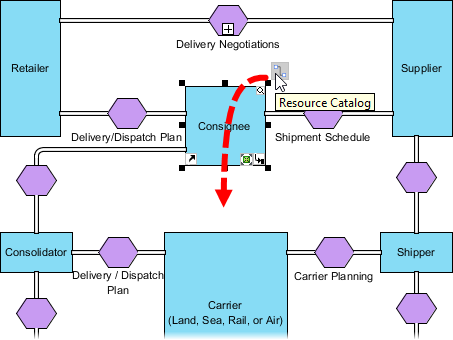
- Release the mouse button and select Conversation Link -> Communication from the Resource Catalog.
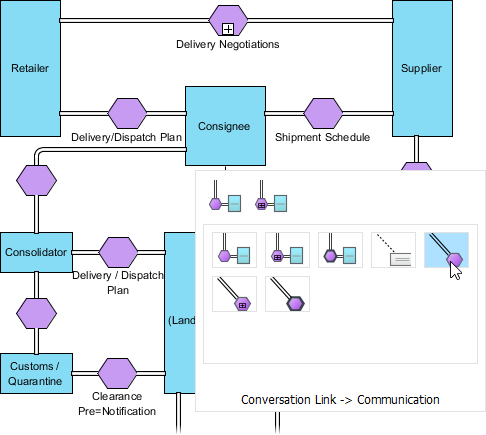
- Connect the created communication, the participant Consolidator and Shipper with conversation link, with the use of Resource Catalog.
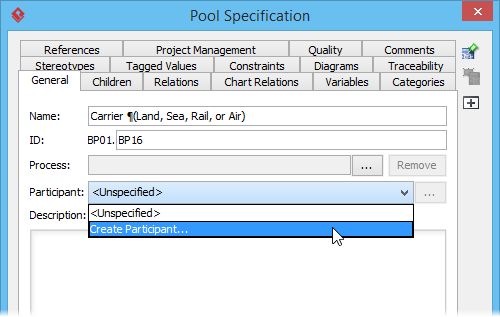
- Move the mouse pointer over the participant Carrier (Land, Sea, Rail, or Air). Click on the Resource Catalog button. Make sure you are clicking on it this time, instead of dragging it.
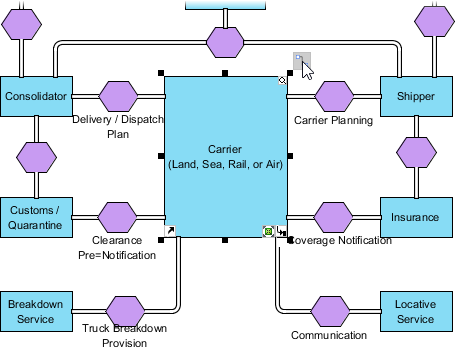
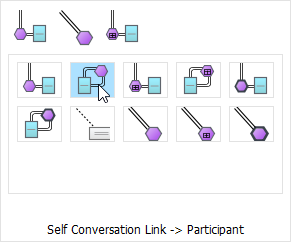
- Select Self Conversation Link -> Participant from Resource Catalog.
- Enter Arrival / Pickup Confirmation as the name of the communication and press Enter to confirm.

- Nearly done. Right-click on the participant Carrier (Land, Sea, Rail, or Air) and select Open Specification… from the popup menu.
- Press on the drop down menu of Participant and select Create Participant… from the drop down menu.
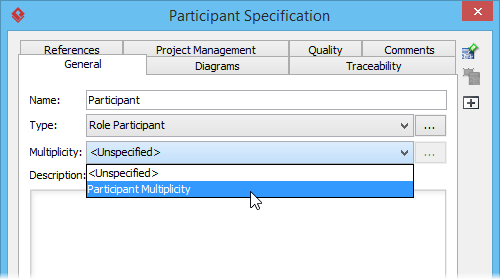
- In the Participant Specification, select Participant Multiplicity as Multiplicity and click OK to confirm.
- Click OK to close the Pool Specification and return to diagram. Finally, your diagram should look like this: