

Iterator Pattern Tutorial
In this tutorial, we will explore the Gang of Four (GoF) iterator design pattern. By the end of this guide, you will have a solid understanding of how to define and apply the iterator pattern in your software projects. We will walk you through creating a UML class diagram for the iterator pattern and show you how to save it as a design pattern file that can be easily reused in the future. Whether you are a novice programmer or an experienced software engineer, this tutorial will help you master the iterator pattern and apply it effectively in your code.
What is Iterator Design Pattern?
The Iterator Design Pattern is a software design pattern that provides a way to access the elements of an aggregate object sequentially, without exposing its underlying representation. In this pattern, an iterator object is used to traverse a collection of objects and provide a standard interface for accessing and manipulating them.
The purpose of the Iterator pattern is to provide a way to iterate over a collection of objects without exposing its implementation details. This means that changes to the collection’s implementation can be made without affecting the client code that uses the iterator.
The Iterator pattern is commonly used in object-oriented programming languages such as Java and C++, where it is part of the standard library. It is also used in many other programming languages, as well as in database systems, file systems, and other software applications that require iteration over a collection of objects.
The Iterator pattern is an important concept for any programmer to understand, as it provides a simple and efficient way to access and manipulate collections of objects, without exposing their underlying implementation details.
Modeling Design Pattern with Class Diagram
- Create a new project Design Patterns.
- Create a class diagram Iterator.

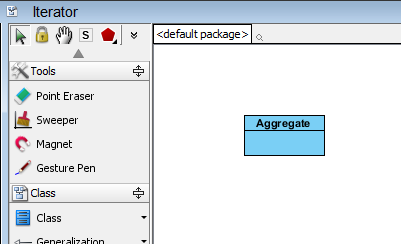
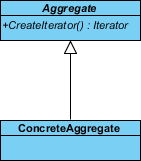
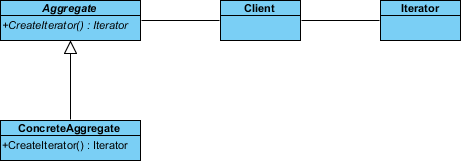
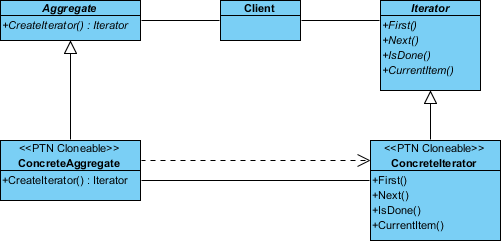
- Select Class from diagram toolbar. Click on the diagram to create a class. Name it as Aggregate.
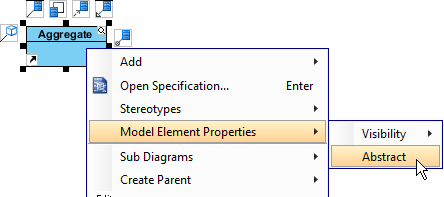
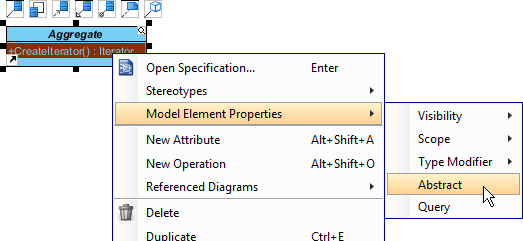
- Right-click on Aggregate, and select Model Element Properties > Abstract to set it as abstract.
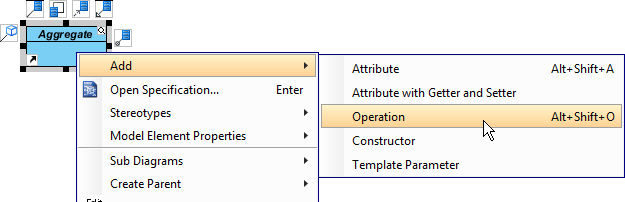
- Right-click on the Aggregate class, and select Add > Operation from the popup menu.
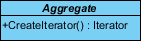
- Name the operation CreateIterator(), and make it return Iterator.
- Right-click on CreateIterator() : Iterator, and select Model Element Properties > Abstract to set it as abstract.
- Move the mouse cursor over the Aggregate class, and drag out Generalization > Class to create a subclass ConcreteAggregate.
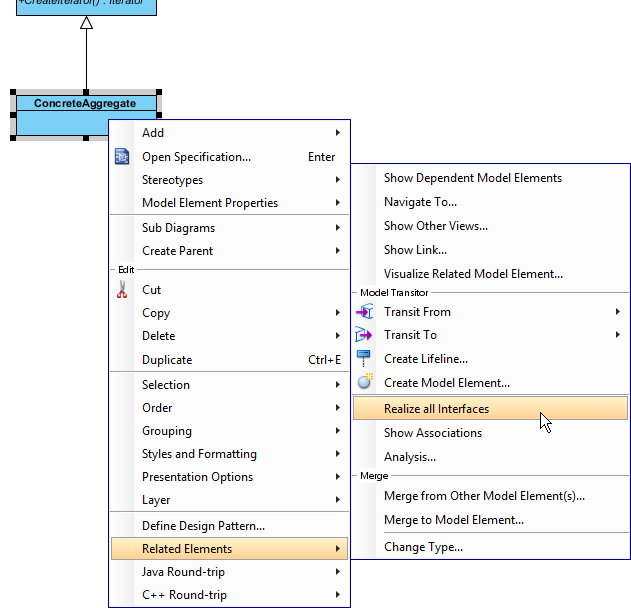
- ConcreteAggregate will inherit the operations from Aggregate. Select ConcreteAggregate, right-click on them and select Related Elements > Realize all Interfaces from the popup menu.
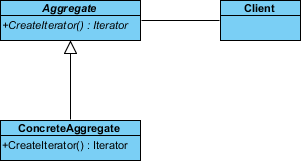
- Create a class Client near Aggregate.

- Move the mouse cursor over the Client class, and drag out Association > Class to Aggregate.
- Move the mouse cursor over the Client class, and drag out Association > Class to create an associated class Iterator.
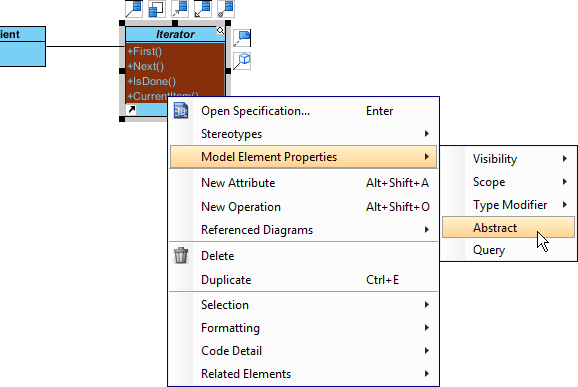
- Right-click on Iterator, and select Model Element Properties > Abstract to set it as abstract.
- Right-click on the Iterator class, and select Add > Operation from the popup menu to add operations: First(), Next(), IsDone(), CurrentItem().
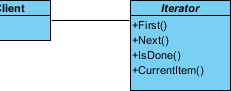
- Select all operations in Iterator. Right-click and select Model Element Properties > Abstract to set it as abstract.
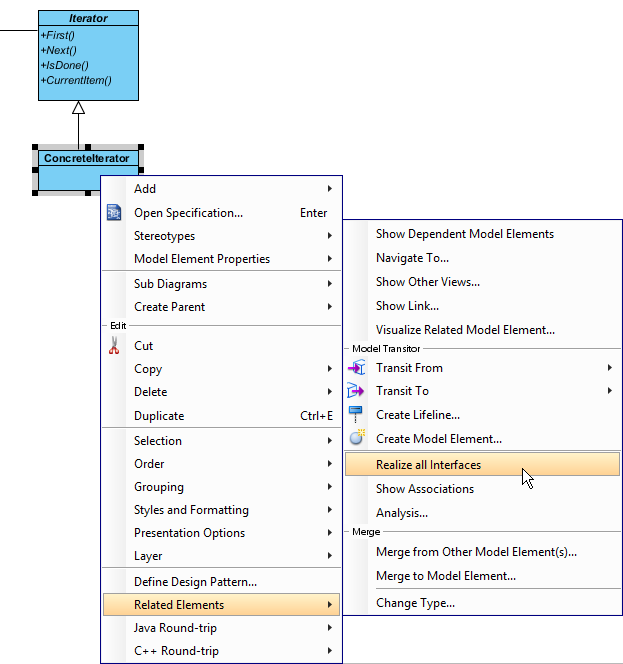
- ConcreteIterator will inherit the operations from Iterator. Select ConcreteIterator, right-click on them and select Related Elements > Realize all Interfaces from the popup menu.
- Move the mouse cursor over the ConcreteAggregate class, and drag out Dependency > Class to class ConcreteIterator.
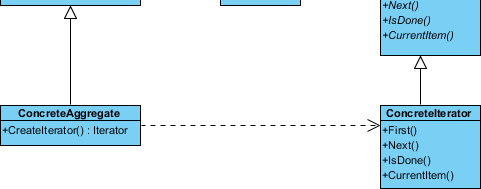
- Move the mouse cursor over the ConcreteIterator class, and drag out Association > Class to class ConcreteAggregate.
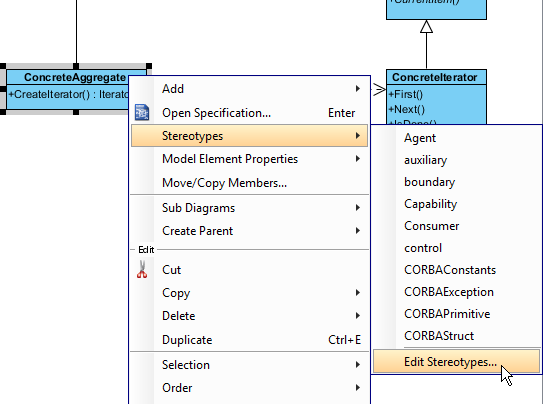
- In practice, there may be multiple ConcreteAggregate classes. To represent this, stereotype the ConcreteAggregate class as PTN Cloneable. Right-click on ConcreteAggregate class and select Stereotypes > Stereotypes… from the popup menu.
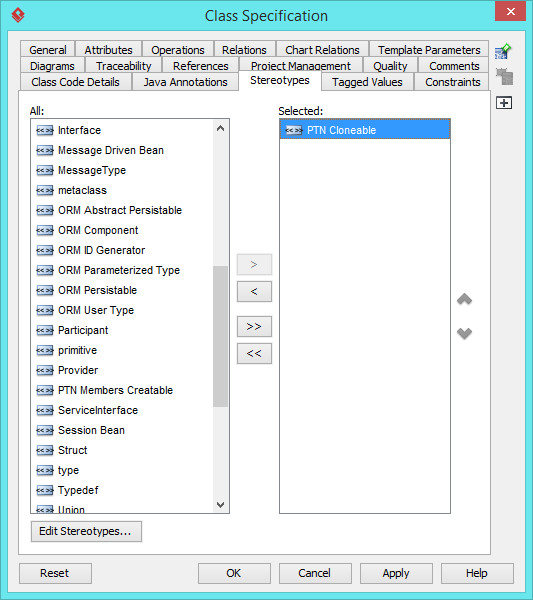
- In the Stereotypes tab of class specification, select PTN Cloneable and click > to assign it to the class. Click OK to confirm.
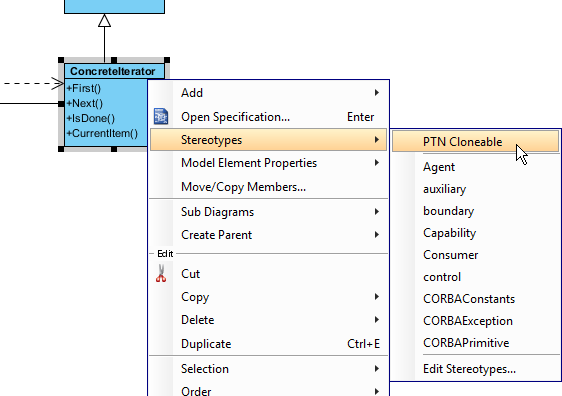
- There may be multiple ConcreteIterator classes. Right-click on ConcreteIterator class and select Stereotypes > PTN Cloneable from the popup menu.
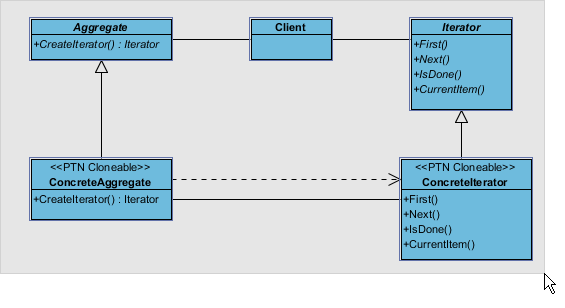
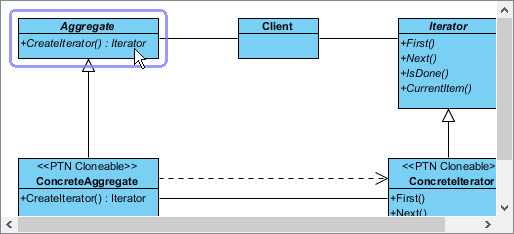
The diagram become:
Saving the Defining Pattern
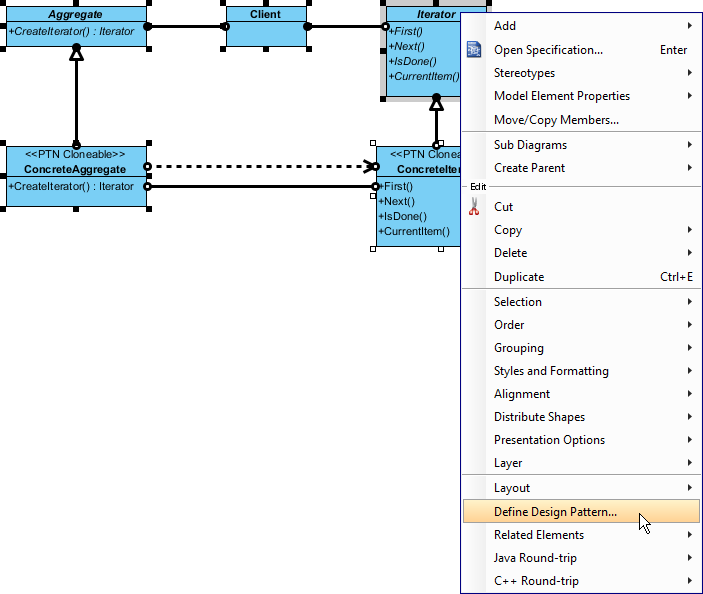
- Select all classes on the class diagram.
- Right-click on the selection and select Define Design Pattern… from the popup menu.
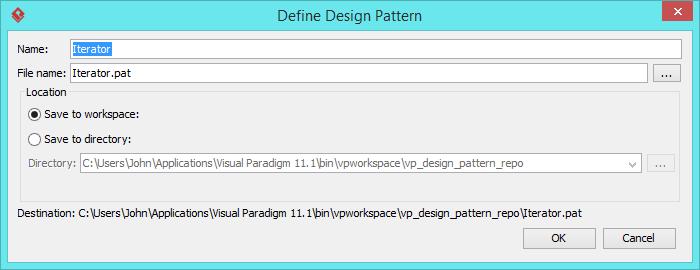
- In the Define Design Pattern dialog box, specify the pattern name Iterator. Keep the file name as is. Click OK to proceed.
Applying Design Pattern on Class Diagram
In this section, we are going to apply the iterator pattern to model the use of iterator in a diagram editor.
- Create a new project Diagram Editor.
- Create a class diagram Domain Model.
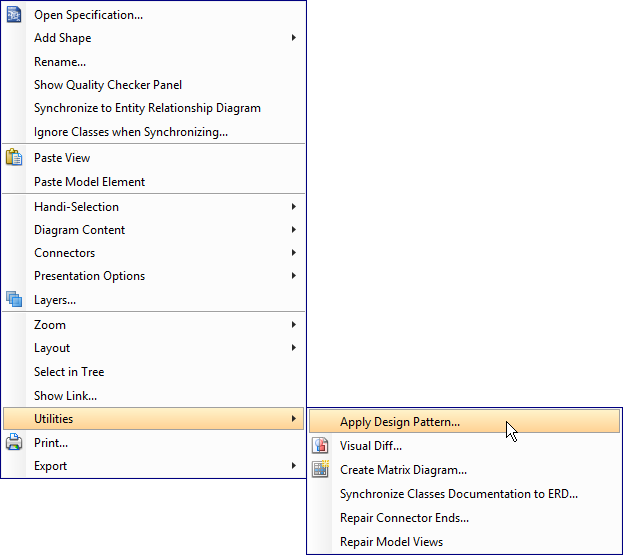
- Right-click on the class diagram and select Utilities > Apply Design Pattern… from the popup menu.
- In the Design Pattern dialog box, select Iterator from the list of patterns.
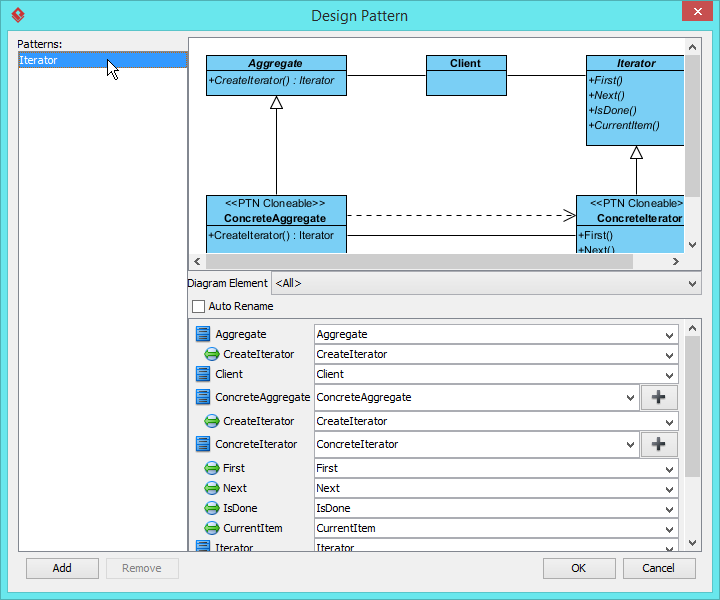
- Click on Aggregate in the overview.
- Rename Aggregate to AbstractList at the bottom pane.

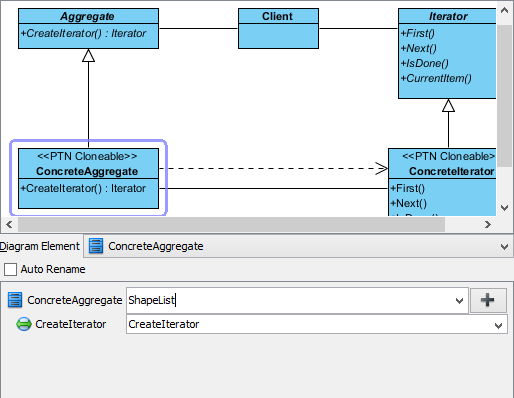
- Select ConcreteAggregate in overview, and rename it to ShapeList at the bottom pane.
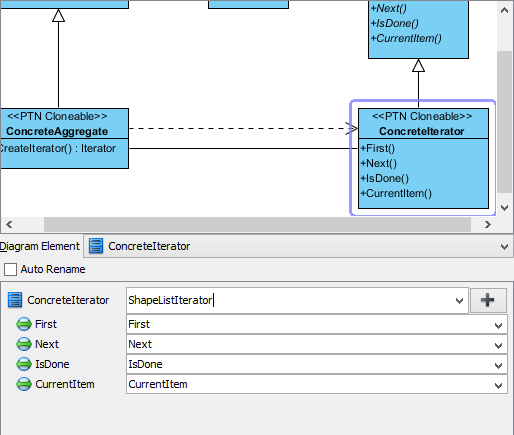
- Select ConcreteIterator in overview, and rename it to ShapeListIterator at the bottom pane.
- Click OK to apply the pattern to diagram.
- Tidy up the diagram. Here is the result:
