How to Use Business Process Simulation?
Relatively speaking, while it may take “little” money to design a business process, it takes a whole lot more for implementation. So it is immensely important that we think twice to make sure that it is worthwhile to do so beforehand. This is where computer simulation comes in to help via load and performance testing. They give us some ideas as to how the system or process would behave under the scenarios we defined, quantitatively, in terms of cost and time investment.
In this tutorial, we will show you how to set parameter values and create scenarios in order to run simulation. During the simulation, you will see that the values on the time and cost meters change as the process moves along under those scenarios. At the end, you will find out the total time and cost the process would require for completion, which give us a means to quantify the performance. If we simulate another process design for the same goal and scenarios, we would have some metrics to compare the robustness among our different process designs.
A Sample Business Process
As an example, we will look at the process of applying for a credit card at a fictional bank called ABC Bank. It involves the applicant, the front desk and back office of the bank. The process begins with the front desk helping the applicant filling an application form. Completed applications then go to the back office for verification. If the application is found to be lacking some supporting documents, the back office will request the applicant for them. When there is sufficient information, the application will be processed. If it gets approved, a credit card will be issued. If not, a rejection letter will be sent to the applicant for notification.
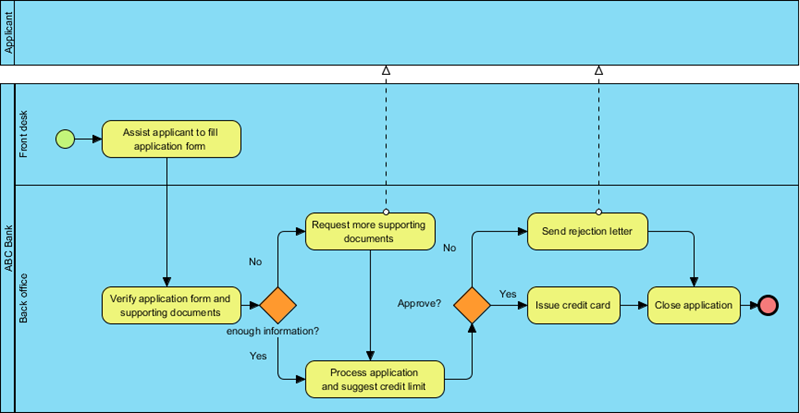
Note: We are not going to show you how to draw the business process diagram step by step here because we have another tutorial which covers that. If you would like to learn more about the drawing part (with BPMN), please read our tutorial of Introduction to BPMN Part I.
Opening the Simulation Panel
- Download Sample-BPD.vpp. You can also find this file at the bottom of this tutorial.
- Open the downloaded .vpp file in Visual Paradigm. To open a project, select Project > Open from the application toolbar.
- Select Modeling > Simulation to open the Simulation Panel.

Setting time and cost for tasks
- For each task, set the time and cost required to complete it once. For example, select the task called Assist application to fill application form.

- Enter 30M as duration, 10.0 USD as cost.
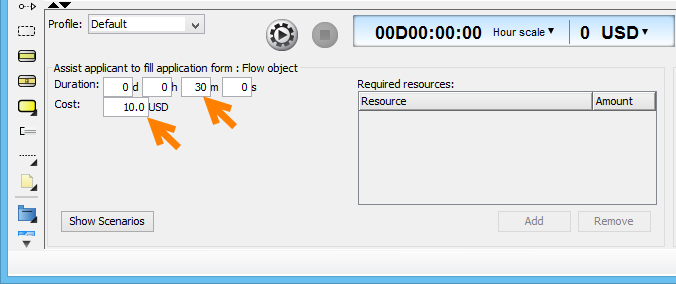
- Repeatedly enter the duration and cost for the remaining tasks, with the sample values provided below:
- Assist applicant to fill application form (30 minutes, USD10.0)
- Verify application form and supporting documents (10 minutes, USD3.0)
- Request more supporting documents (5minutes, USD3.0)
- Process application and suggest credit limit (1 hour, USD30.0)
- Send rejection letter (10 minutes, USD5.0)
- Issue credit card (1 hour, USD10.0)
- Close application (zero time, zero cost)
Setting lane instances
In this section,we will define resources for both the front desk and the back office.
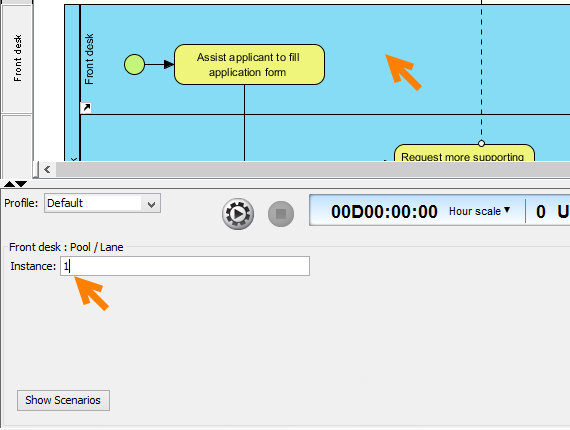
- Click on the lane Front desk to select it and then enter 1 as Instance (e.g. manpower).
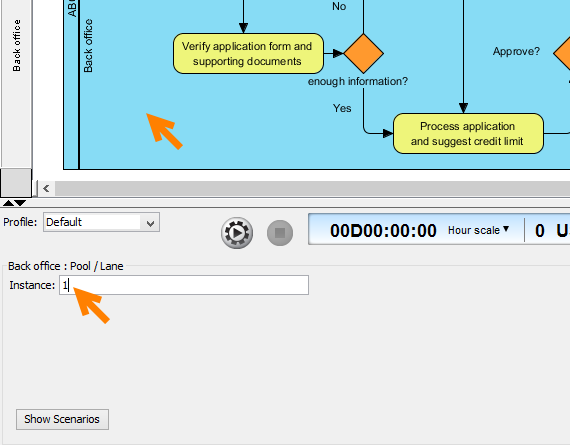
- Select the lane Back office and enter 1 as Instance.
Creating scenarios
In this section, we are going to create two scenarios.
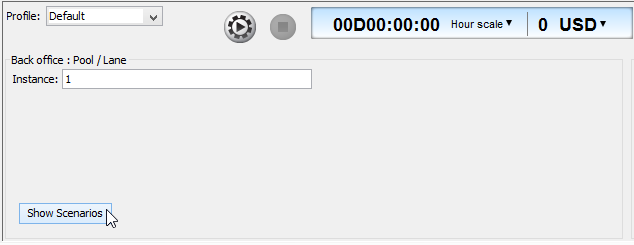
- Click Show Scenario.
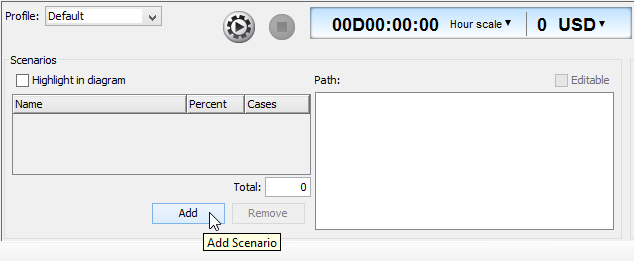
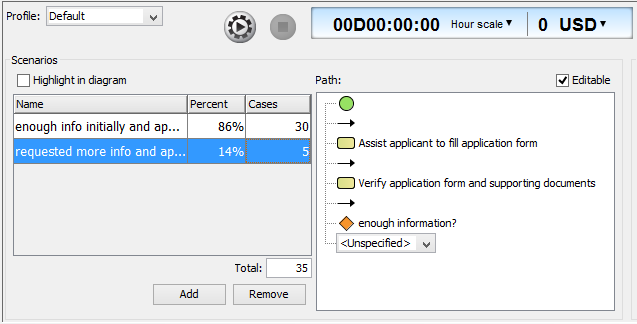
- Click Add to create a scenario which appears in row in the table. Basically, three things define a scenario – (1) its name, (2) the number of cases and (3) the path.
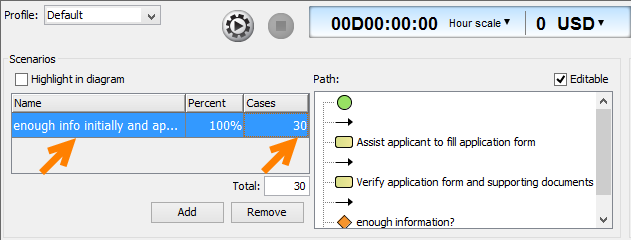
- Name the new scenario enough info initially and approved. Say there are 30 credit card applications in this scenario. So enter 30 for the number of cases.
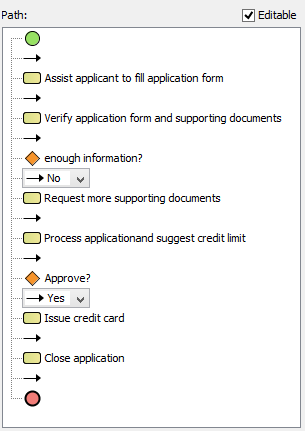
- Set the following path to account for the scenario in which there is sufficient information when the application is first received and that it gets approved in the end.
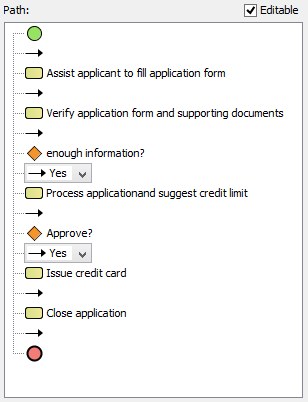
Tip: If you check the checkbox next to Highlight in diagram, you will see the path visually in the business process diagram in highlight (e.g. purple) as you define it in the list. - Then create another scenario called requested more info and approved to account for applications that didn’t come in with sufficient information initially and only get processed after requesting for additional information. But in the end, they get approved.
Run simulation
After setting up the scenarios, we are now ready to simulate them. To start simulation, simply click the Start button.

You are free to pause the simulation any time by clicking the pause button. For example, so far the process has taken 0 days 7 hours 30 minutes 0 seconds. And a cost of USD320 has been accrued.

During the simulation, you will see 2 symbols in the diagram – red inverted triangles and green gears. Take the below diagram as an example. There are 2 applications (after requesting and receiving additional supporting documents) now pending to be processed for a credit limit. Meanwhile, at this very moment, there are 6 applications (that came with enough information when first received) now pending to be processed, just like the other 2 waiting in queue. The green gear shows that there is one application currently being processed by that task.

As the simulation ends, you can read the meter and see the total time and cost for that process (e.g. 3 days 4 hours 45 minutes 0 seconds and USD1,870). The red inverted triangles and green gears should all have disappeared by now.
![]()
Showing charts
The simulation charts tell us statistics about things such as resource consumption, which helps us identify bottlenecks and improve the process.
- Click the Simulation Charts button.

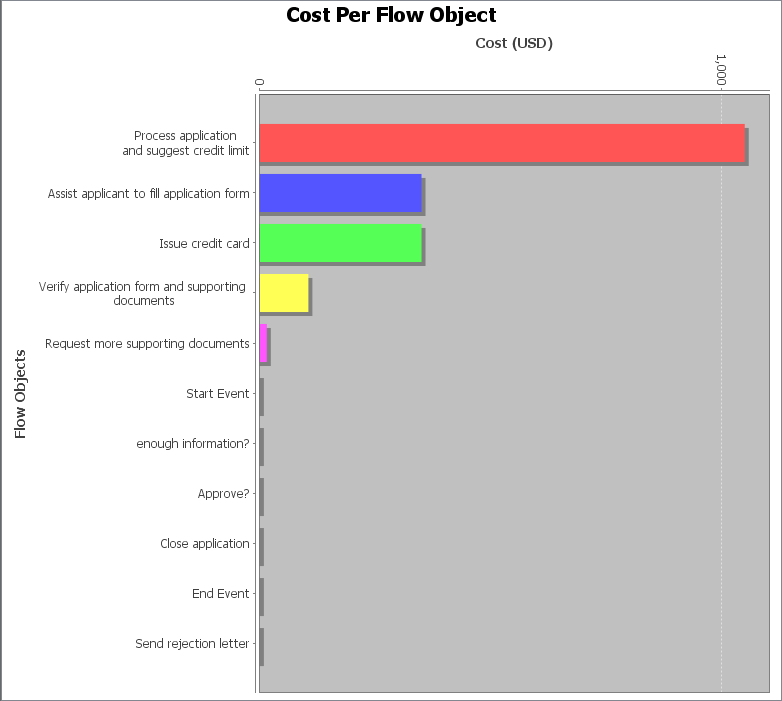
- Various charts appear in the window opened. Look at the Cost Per Flow Object chart and learn which task is most expensive in terms of cost (e.g. Process application and suggest credit limit).
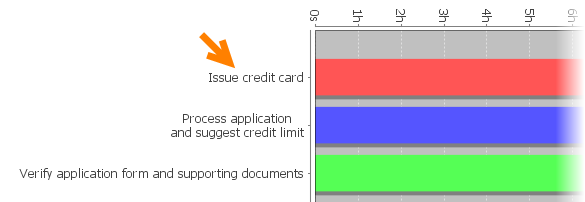
- Have a look at another chart called Queue Time. The chart shows the total queue time of applications waiting in line to be processed by various tasks within the process.
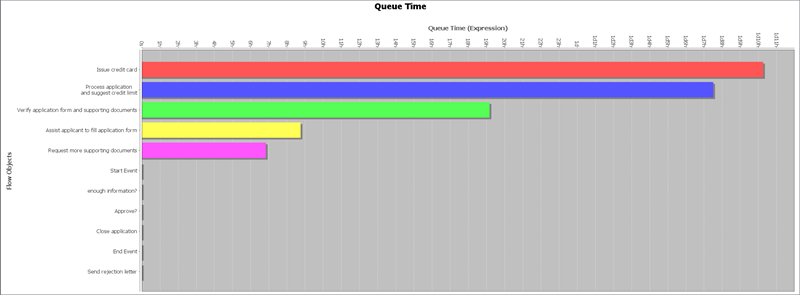
It turns out that pending applications were in line the longest for the task to issue a credit card (e.g. a bottleneck).
Process improvement
To improve our process, we might consider redistributing the task load. The top 3 tasks in terms of queue time would be a logical place to begin playing around with. Unfortunately, the top two tasks – issue credit card and process application and suggest credit limit – must stay in the back office due to sensitive information. So the next best try would be to move the task to verify application form and supporting documents to the front desk.
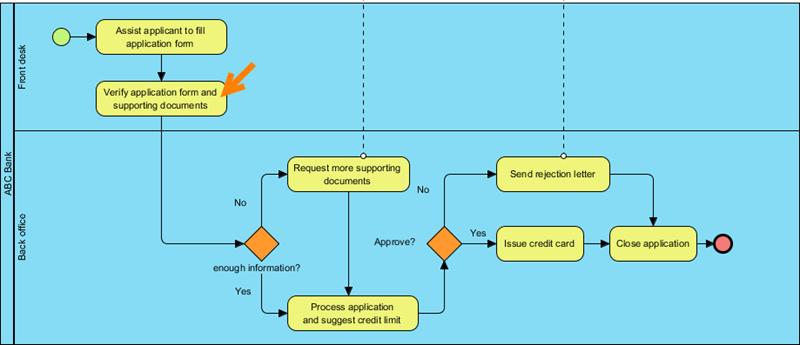
After we move the task to the front desk lane and rerun the simulation, we learn that the new process would save us a little over 10 hours of work only, which may not worth the trouble to deploy a process change.
![]()


