Visitor Pattern Tutorial
In this tutorial, you’ll learn about the Gang of Four (GoF) visitor design pattern, its definition, and its applications. You’ll also be guided on how to create a UML class diagram for the visitor pattern and how to save it as a design pattern file for future use. By the end of this tutorial, you’ll have a better understanding of how to implement the visitor design pattern in your software projects.
What is Visitor Design Pattern?
The Visitor design pattern is a behavioral pattern in object-oriented programming that allows you to separate an algorithm from an object structure on which it operates. It provides a way to add new operations to an object structure without modifying the objects themselves.
In other words, the Visitor pattern allows you to define a new operation to a group of related objects by encapsulating it in a separate object. This separate object is known as the visitor, and it can visit each object in the group, executing the appropriate operation for that object. This approach provides greater flexibility and makes it easier to add new operations to an existing object structure without modifying the objects themselves.
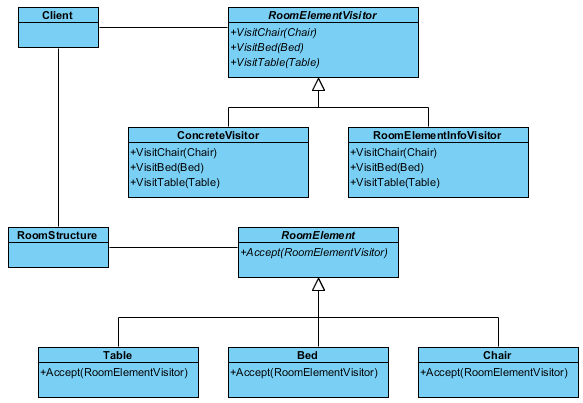
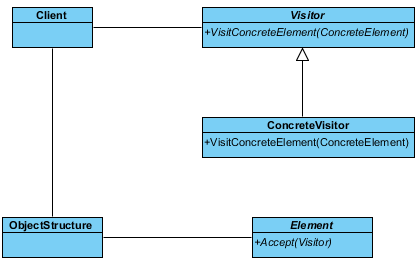
The Visitor pattern consists of four main components: the visitor interface, concrete visitor, element interface, and concrete element. The element interface represents the objects that will be visited, while the visitor interface declares the operations that can be performed on these objects. The concrete visitor implements the visitor interface and provides the implementation for the operations declared in the visitor interface. The concrete element implements the element interface and provides the implementation for the accept method, which accepts a visitor object and allows it to perform operations on the element.
Overall, the Visitor pattern is useful when you need to add new operations to a complex object structure without modifying the objects themselves. By encapsulating these new operations in a separate object, you can easily extend the functionality of an existing object structure and make it more flexible and maintainable.
Modeling Design Pattern with Class Diagram
- Create a new project Design Patterns.
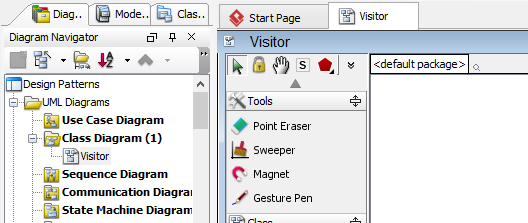
- Create a class diagram Visitor.
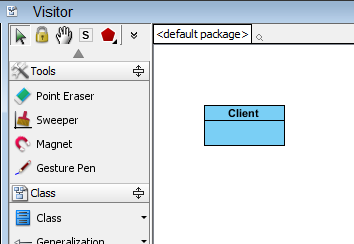
- Select Class from diagram toolbar. Click on diagram to create a class. Name it as Client.
- Move the mouse cursor over the Client class, and drag out Association > Class to create an associated class Visitor.

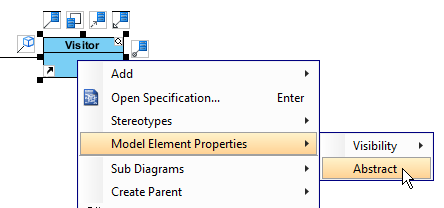
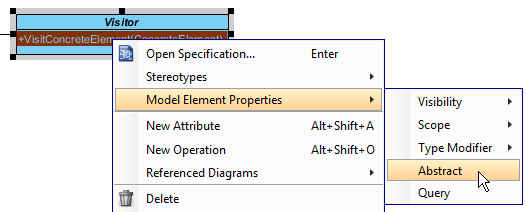
- Right-click on Visitor, and select Model Element Properties > Abstract to set it as abstract.
- Right-click on the Visitor class, and select Add > Operation from the popup menu.

- Name the operation VisitConcreteElement(ConcreteElement).
- Right-click on VisitConcreteElement, and select Model Element Properties > Abstract to set it as abstract.
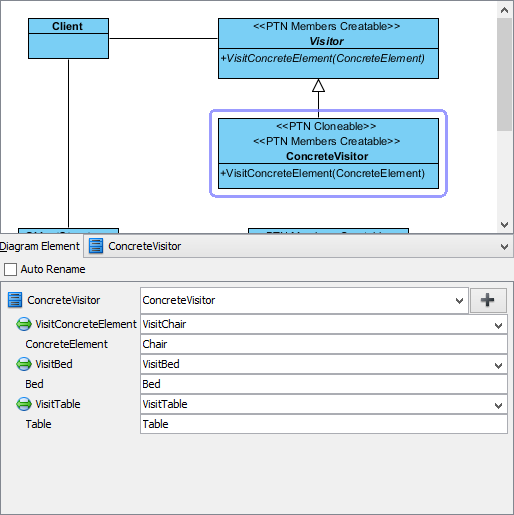
- Move the mouse cursor over the Visitor class, and drag out Generalization > Class to create subclasses ConcreteVisitor.
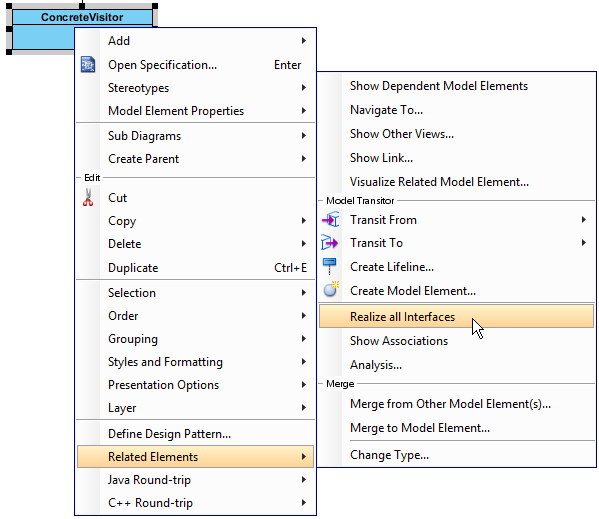
- We need to make the concrete visitors inherit operations from the visitor class. Right-click on ConcreteVisitor and select Related Elements > Realize all Interfaces from the popup menu.
- Move the mouse cursor over the Client class, and drag out Association > Class to create an associated class ObjectStructure.
- Move the mouse cursor over the ObjectStructure class, and drag out Association > Class to create an associated class Element.

- Right-click on Element, and select Model Element Properties > Abstract to set it as abstract.
- Right-click on the Element class, and select Add > Operation from the popup menu. Name the operation Accept(Visitor).
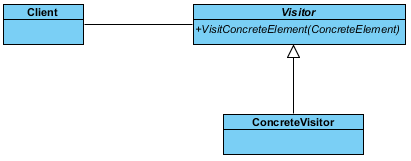
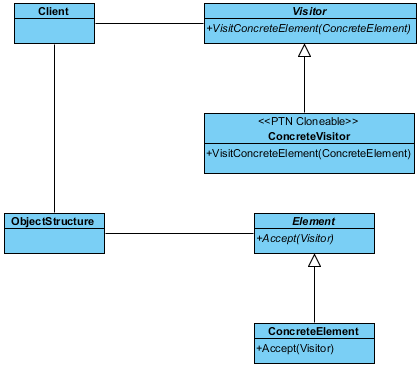
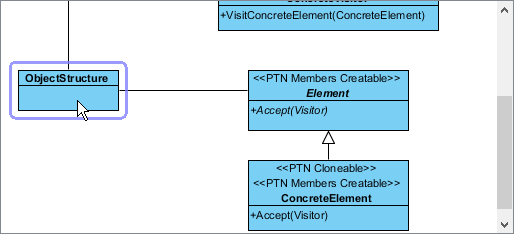
- Right-click on Accept(Visitor), and select Model Element Properties > Abstract to set it as abstract. Up to now, the diagram becomes:
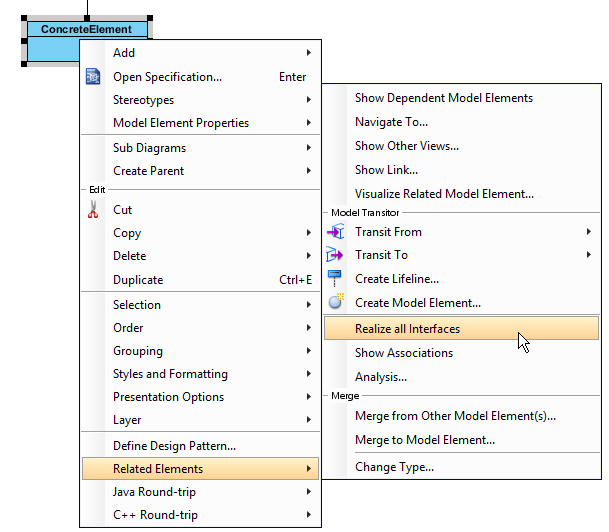
- Move the mouse cursor over the Element class, and drag out Generalization > Class to create subclasses ConcreteElement.
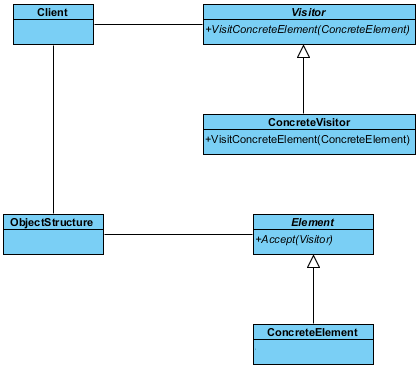
- We need to make the concrete elements inherit operations from the element class. Right-click on ConcreteElement and select Related Elements > Realize all Interfaces from the popup menu.
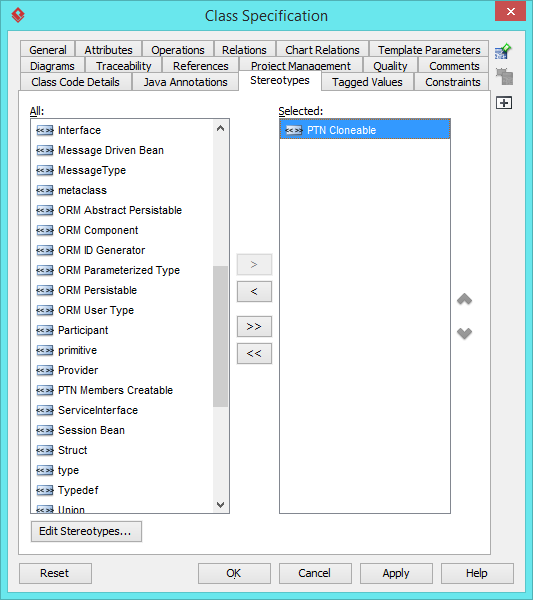
- In practice, there may be multiple ConcreteVisitor class. To represent this, stereotype the ConcreteVisitor class as PTN Cloneable. Right-click on ConcreteVisitor class and select Stereotypes > Stereotypes… from the popup menu.
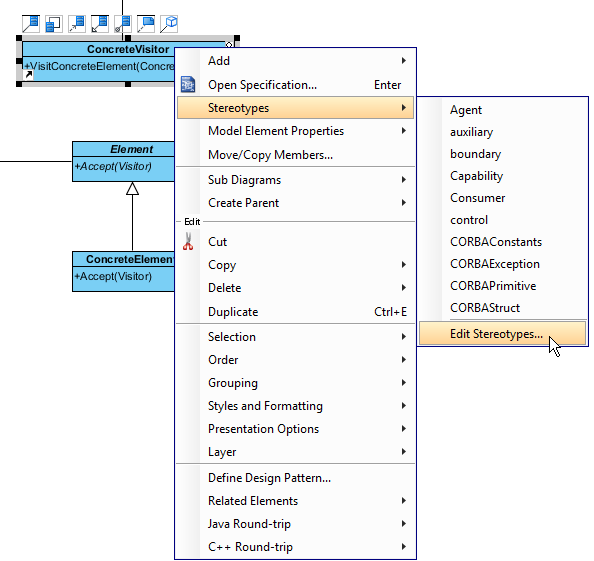
- In the Stereotypes tab of class specification, select PTN Cloneable and click > to assign it to the class. Click OK to confirm.
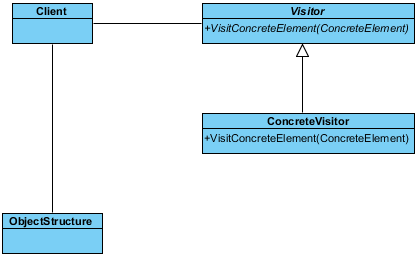
- Repeat step 18 and 19 on ConcreteElement.
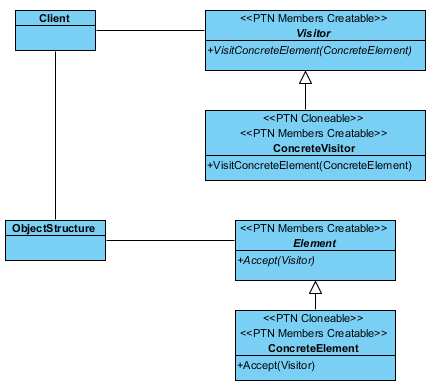
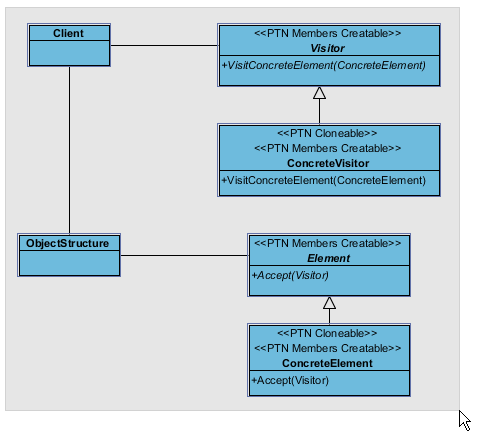
- There maybe multiple operations in Visitor, Element and ConcreteElement. To represent this, stereotype them as PTN Members Creatable. Repeat steps 18 and 19 to stereotype Visitor, Element and ConcreteElement as PTN Members Creatable. Up to now, the pattern should look like this:
Saving the Pattern
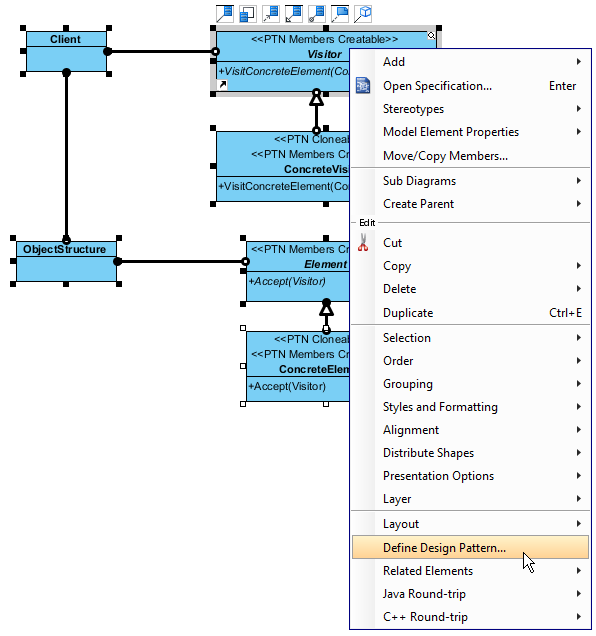
- Select all classes on the class diagram.
- Right-click on the selection and select Define Design Pattern… from the popup menu.
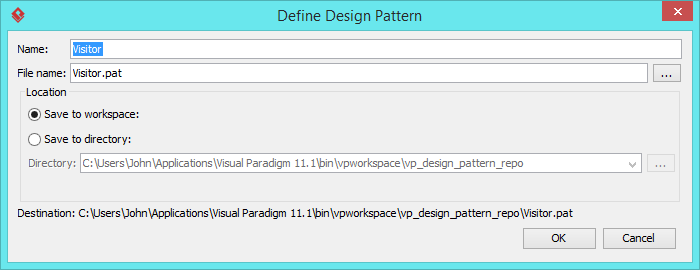
- In the Define Design Pattern dialog box, specify the pattern name Visitor. Keep the file name as is. Click OK to proceed.
Applying Design Pattern on Class Diagram
In this section, we will try to make use of the visitor pattern to model the visiting of elements in a room.
- Create a new project My Room.
- Create a class diagram Domain Model.
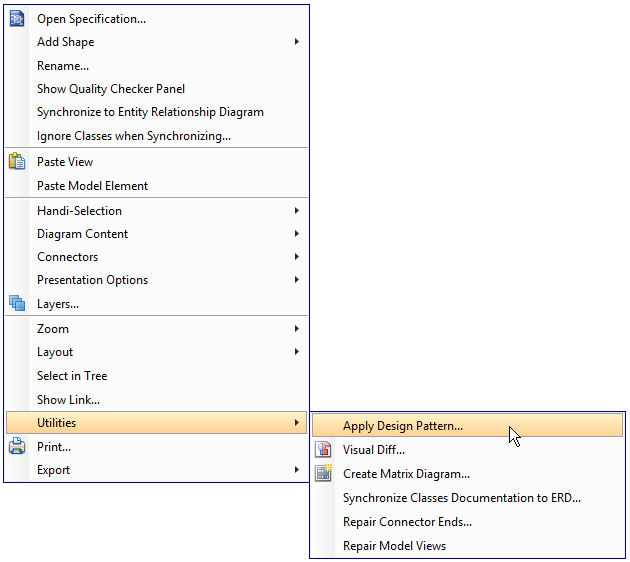
- Right-click on the class diagram and select Utilities > Apply Design Pattern… from the popup menu.
- In the Design Pattern dialog box, select Visitor from the list of patterns.
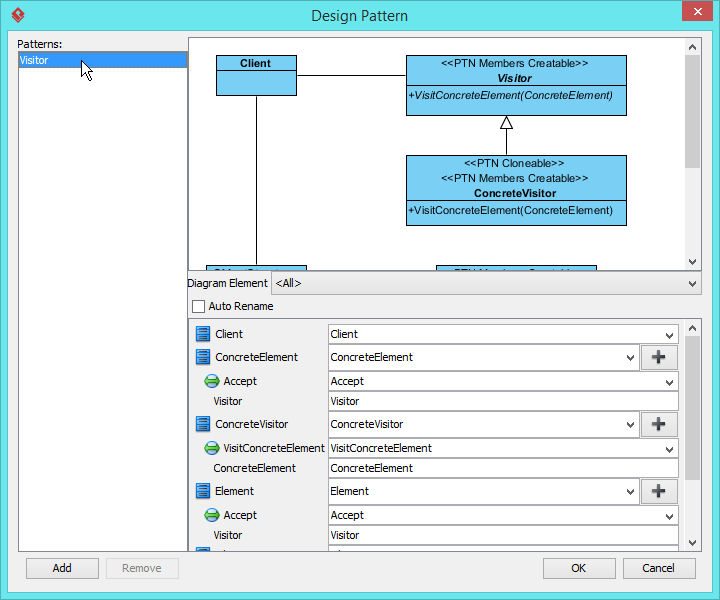
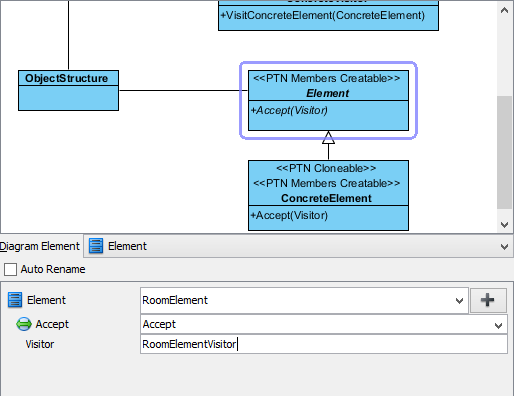
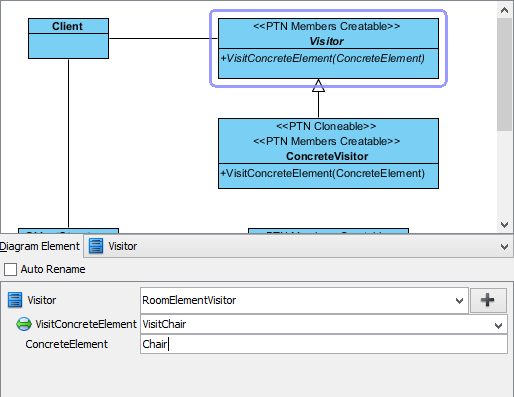
- Click on ObjectStructure in the overview.
- Rename it to RoomElements at the bottom pane.

- Select Element in overview. At the bottom pane, rename it to RoomElement. Rename parameter Visitor in Accept() to RoomElementVisitor.
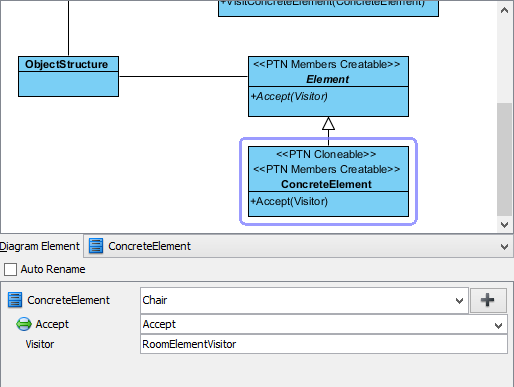
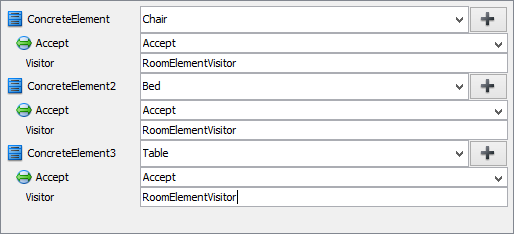
- Select ConcreteElement in overview. At the bottom pane, rename it to Chair. Rename parameter Visitor in Accept() to RoomElementVisitor.
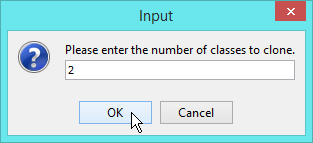
- We need 2 more concrete elements for bed and table. Keep ConcreteElement selected, click on the + button and select Clone… from the popup menu.

- Enter 2 to be the number of classes to clone. Click OK to confirm.
- At the bottom pane, rename ConcreteElement2 and ConcreteElement3 to Bed and Table. Rename parameter Visitor to RoomElementVisitor.
- Select Visitor in overview. At the bottom pane, rename it to RoomElementVisitor. Rename operation VisitConcreteElement to VisitChair, and parameter ConcreteElement to Chair.
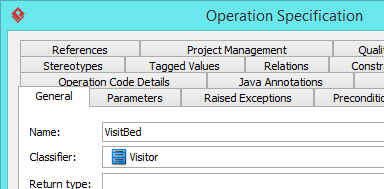
- We need 2 more operations for visiting bed and table. Keep Visitor selected, click on the + button and select New Operation… from the popup menu.

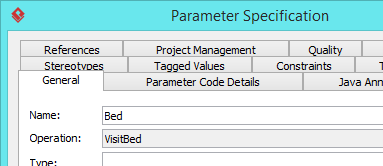
- In the Operation Specification dialog box, name the operation VisitBed.
- Open the Parameters tab.
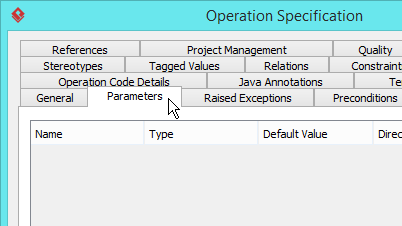
- Click Add… at the bottom, and create parameter Chair in Parameter Specification dialog box. Click OK to go back to the Operation Specification dialog box.
- In the General page, check Abstract.
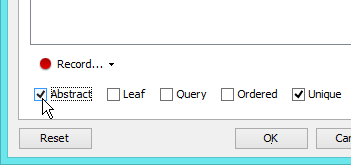
- Click OK to confirm editing.
- Repeat steps 13 to 18 to create one more abstract operation VisitTable which have Table as parameter.
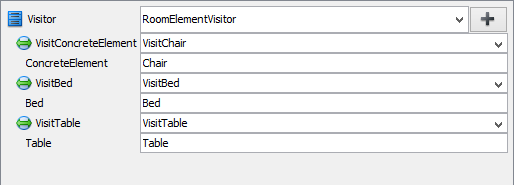
- Select ConcreteVisitor in overview. At the bottom pane, rename it to RoomElementPaintVisitor. Rename operation VisitConcreteElement to VisitChair, and parameter ConcreteElement to Chair.
- We need one more visitor for printing elements’ information. Keep ConcreteVisitor selected, click on the + button and select Clone… from the popup menu.

- Enter 1 to be the number of classes to clone. Click OK to confirm.

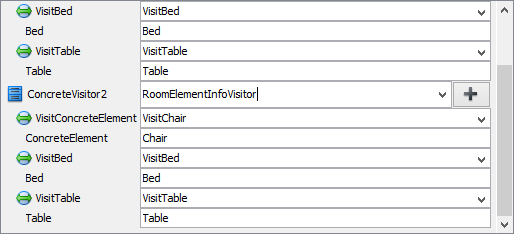
- At the bottom pane, rename ConcreteVisitor2 to RoomElementInfoVisitor. Rename operation VisitConcreteElement to VisitChair, and parameter ConcreteElement to Chair.
- Click OK to confirm editing and apply the pattern to diagram.
- Tidy up the diagram. It should become: